
Spooky Season is here and we have three fun and festive Halloween crafts that focus heavily on fine motor development and sensory play! Each of these Halloween crafts has an emphasis on development of pincer grasp, tripod grasp, and index finger isolation.
Through these crafts, your child will explore touch senses and messy play with glue, paint, and tissue paper to promote sensory integration all while making something festive or the whole family. These activities also target executive functioning skills such as sequencing and problem solving, all while having making something that will look great on your fridge this fall!
1: Black Cat
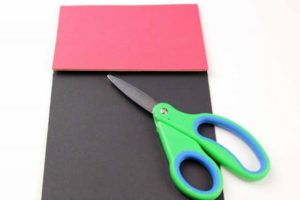
- Materials Needed:
- – Paper plate
- – Glue
- – Stapler
- – Black, pink, and white construction paper
- – 2 grey pipe cleaners,
- – Scissors
- – Optional – Black tissue paper (or black construction paper)
- Steps:
- – Rip the black construction paper or tissue paper into a lot of small pieces or have your child cut the paper into small squares.
- – Glue the squares or ripped paper on the paper plate.
- – Have your child draw two medium sized triangles on black paper as ears
- – Have your child draw two diamonds (for eyes) and a mouth on the white paper
- – Have your child and a button-shaped nose on the pink paper. (If your child is not yet able to draw those shapes, you can draw them first with a yellow marker or pencil and have your child trace.)
- – Glue the shapes onto the plate.
- – Fold the pipe cleaners in half and then staple them onto the plate.

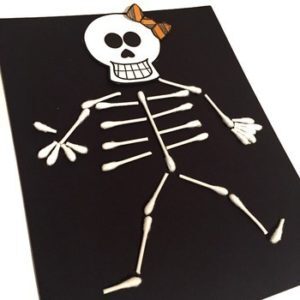
2: Skeleton
- Materials Needed:
- – Black construction paper
- – White paper
- – Liquid glue
- – Pencil
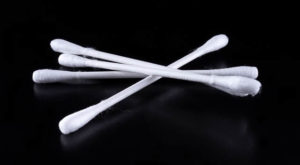
- – Q-tips
- – Scissors (optional)
- Steps:
- – Draw a skeleton shape on the paper with the pencil (you can include individual fingers toes, and ribs if you would like).
- – Using the Q-tip, have your child trace the skeleton outline with the liquid glue.
- – Place the Q-tips on top of the glue. (You might need to snip the Q-tips if you are including fingers and toes.)
- – Draw and cut out a head for the skeleton on the white paper. Glue it on to the black paper.
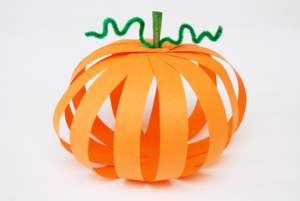
3: Pop-Up Pumpkin
- Materials Needed:
- – Orange construction paper (2)
- – Green construction paper (1)
- – Scissors
- – Glue
- – Hole punch
- – Green pipe cleaner

- Steps: Part I
- – Cut one sheet of orange construction paper into 8 even vertical strips.
- – Use half of a second sheet of orange construction paper to create 4 additional strips.
- – Grab a pair of paper strips and glue them together to create a long strip of paper. Complete 2x (4 strips of paper).
- – Make a cross with the 2 long strips and glue them together in the center.
- – Grab remaining short strips and glue them onto 1, 2, 4, and 5, 7, 8, 10, 11 o’clock positions.
- Steps: Part II
- – Punch a hole close to the tip of each of the 12 paper strips.
- – Make a stem by cutting your green construction paper into a small rectangle and roll into a cylinder. Glue or tape shut.
- – Lift the 1 o’clock strip, and push the stem through until it fits snuggly.
- – Lift the 2 o’clock strip and put glue around the surrounding hole.
- – Bring the 1 o’clock strip with the stem over the 2 o’clock strip.
- – Insert the stem through the hole on the 2 o’clock strip and press glue into place.
- – Repeat with the rest of the strips until you have a pumpkin looking shape.
- – Create leaves with green pipe cleaners and place into holes.
Enjoy The Fall Fun With The Whole Family!
Have a great time and a happy Halloween! Please share with us your Halloween crafts and your family fun. Still having fine motor difficulties? Check our page on Occupational Therapy or call one of our pediatric occupational therapists today to schedule an assessment and learn some great tools to strengthen these skills in your child! We can be reached at 773-687-9241!